Installation
The FFEA viewer is available as a plugin for the PyMOL molecular graphics system. It requires PyMOL 1.6.x or above, and Python 2.6.x or above.
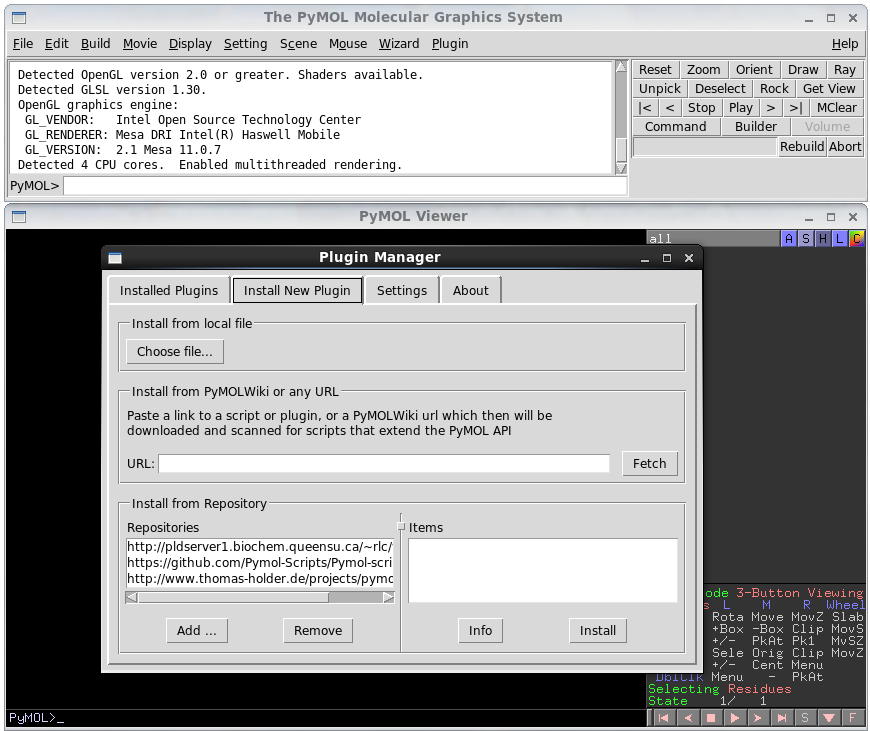
After installing FFEA, the plugin FFEAplugin.tar.gz will be found in $FFEA_HOME/share/ffea/plugins/pymol. (If that were not the case, the files can be found under the build folder in /ffeatools/analysis/pymol_plugin. One would need then to add this folder to a .zip or tar.gz archive). In order to install the plugin, open PyMOL, and click 'Plugin' on the top menu bar, then 'Plugin Manager'. Select the 'install new plugin' tab, and click 'choose file'. Then, locate the .tar.gz archive.
Loading your system
When PyMOL loads, open the Plugin menu, and you should see a new option called FFEA loader. This has a file menu that will allow you to select an FFEA script and load the FFEA script file, but before doing that, review the options. Currently, the model needs to be reloaded every time these settings are changed.

The FFEA viewer settings are:
System name: arbitrary, used to identify the system in the PyMOL sidebar.Display: displays spring objects and pinned nodes if checked.Show solid:Plain solidrenders the mesh in flat colours.Densitycolours the mesh different depending its density, as read in the material file.Shear Viscositycolours the mesh different depending its shear viscosity, as read in the material file.Bulk Viscositycolours the mesh different depending its bulk viscosity, as read in the material file.Shear Moduluscolours the mesh different depending its shear modulus, as read in the material file.Bulk Moduluscolours the mesh different depending its bulk modulus, as read in the material file.VdWcolours the mesh different depending the van der Waals face type of the faces, as read in the vdw file.No Soliddoes not display a solid mesh.
Show Mesh:Surface Meshrenders a wire-frame of the surface.Whole Meshrenders a wire frame that includes the internal elements.No meshdoes not display a wire frame mesh.
Show Indices: displays the indices as labels. Alternatively, one could useAdd Atoms.Node Indicesdisplays the indices of all the nodes, including the 2nd-order nodes.Node Indices (Linear)only displays the indices of the linear elements. In most cases, this is more useful, as displaying second-order nodes can make the image hard to read.Element Indicesdisplays the indices of the elements.Face Indicesdisplays the indices of the faces (surface elements) only.No indicesdoes not display indices.
Show Box:Simulation Box (outline)draws an outline of the simulation box - the simulation box is the volume which objects in the simulation can occupy.Simulation Box (whole)draws the entire box.No Boxwill draw no box.
Load:Trajectoryis the loading type to use if you have a finished trajectory (.ftj file) that has been generated by the runner. It will load each frame of the trajectory into PyMOL. If the trajectory is not found the system will be loaded (into box).System (Into box)will load the starting state of the system, and it will show how the system will be initialised relative to the box. It can be used to check the size of your molecule(s) compared to the simulation box and check that their position is correct.System (Plainly)will load the system plainly, using the same coordinates that appear in the.nodefile, rotating and translating according to keywordsrotationandtranslation, but not centering the system onto the simulation box. Depending on the way the models have been generated, this may be the best way to visualise the models before starting the simulation. This is specially useful when checking that the model has been set up correctly, as one can load the FFEA system alongside a (number of) PDB file(s), thus checking that both share origin and scale.CGOwill load the trajectory and cache the calls to PyMOL's API directly to the hard drive. This results in a slower initial load, but faster subsequent loads.
Add Atoms: will add create a PyMOL object, or molecule, with a number of CA atoms.Nonedoes not load anythingOnto Linear Nodeswill add atoms on every first order node, where PyMOL attributeresiwill match the corresponding FFEA node number.Onto Nodeswill add atoms on every node, where PyMOL attributeresiwill match the corresponding FFEA node number.Onto Faceswill add atoms on every face, where PyMOL attributesresiwill match the corresponding FFEA face number. Notice that FFEA uses second order faces in short range forces, and so one will find 4 nodes on every triangle if loadsWhole Mesh(but only one if loadingSurface Mesh).Onto Elementswill add atoms at the centre of every element, where PyMOL attributeresiwill match the corresponding FFEA node number.
Viewing models
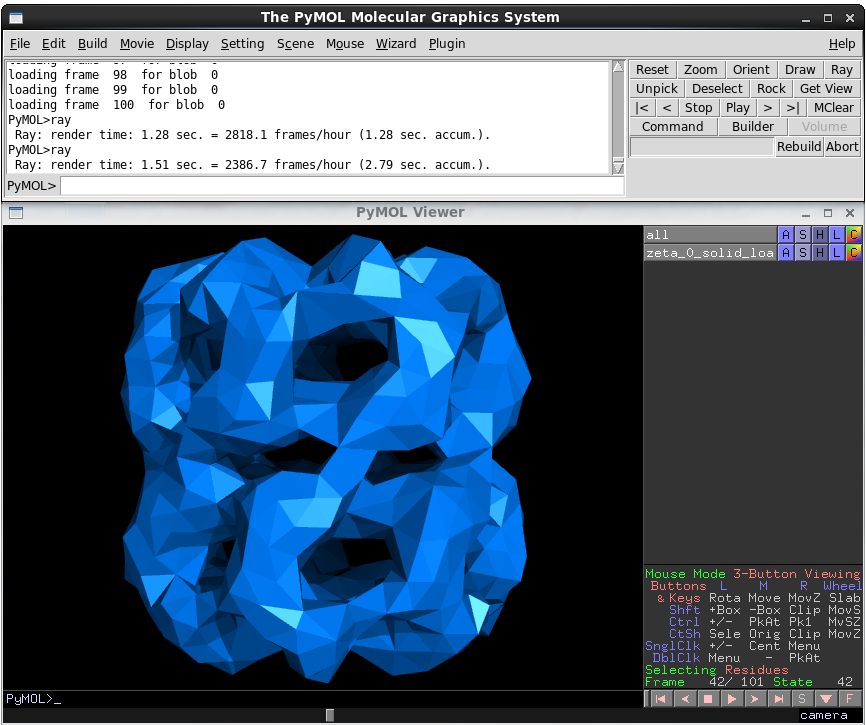
The PyMOL viewer interface is relatively straightforward. A list of loaded objects appears on the right-hand side. The 'action' menu (A) allows you to rename, centre and delete objects. The S, H and L menus let you show, hide and label elements that only appear on other formats. The C button allows you to recolour the object. Clicking on the objects name shows and hides that object. At the bottom-right, there are camera controls, and playback controls.
Exporting images and videos
To export a still image, click the file menu, and click Save Image As. For higher-quality images, you may wish to resize the viewport, as images are exported at the same resolution they are displayed Also consider right-clicking the viewing area and clicking ray, which will generate a (higher-quality) ray-traced frame.
PyMOL does not export videos by default, although installing the FreeMOL addons and an MPEG encoder will all you to do so.
To get higher-quality videos in a more modern format, select File->Save Movie As->PNG Images. This will save each frame as a still image, organised by file name. For example, saving with the file name 'test' for a 100-frame trajectory will produce 100 PNG files, called test0001.png to test0100.png.
To stitch these together into a video, you can use ffmpeg, a command-line tool. Install ffmpeg and call it using the following arguments:
ffmpeg -r 60 -i name%04d.png -c:v libx264 -pix_fmt yuv420p -vf "scale=trunc(iw/2)*2:trunc(ih/2)*2" out.mp4
The arguments are
-r, the framerate-i, the input. The%04dmeans that FFMpeg will compile together any frames matching that format (e.g.name0001.png,name0002.png).-c:v, the codec-pix_fmt, the pixel format- -
vf, user-configurable filter. PyMOL can often output files with very awkward dimensions, which are hard to encode - this filter fixes that.
Finally, the output file name is a positional argument.